Landscaping with Limited Money
LANDSCAPING – Do it in Stages
If money is limited, one way to approach landscaping is to develop your garden in stages!
DO IT IN STAGES
Often the garden has to be developed in stages because:
- The money isn't available to do it all at once.
- Other work must be done first (ie. A sewerage main is to be laid, a shed erected, or a building extended).
Undeveloped, or underdeveloped parts of the garden might be screened with fast growing plants or a temporary fence until they are able to be attended to. Areas designated for paving, garden beds or water gardens might be grassed to provide a reasonable appearance until the time is right to finish the development.
As with anything it is always a good idea to start with a plan. List out everything you want to include in the garden ‑eventually ‑and arrange these things in order from your highest priority to your lowest. (NB: The low priority item might be low because it's expensive, not necessarily because you want it any less).
Your "prioritized" list might be something like this:
A well planned garden will eventually accommodate everything on your list, but may very well consider the garden's development as an evolutionary process over many years; and at any stage of that evolutionary process the garden should still be aesthetically pleasing and functional.
THE PLANNING PROCESS
Landscape planning is both an art and a science. It's a process which needs to consider the physical requirements of building a garden, and at the same time strive to create something which is artistic and pleasing to the eye.
DON'T BE PUT OFF BY THE CHALLENGE THOUGH!
Planning your garden can be a lot of fun, and remember it's a lot cheaper to make your mistakes on paper!
Follow this step by step process and you can't go too wrong:
- Draw a sketch of your property (preferably to scale) as it is now. A builders plan is often good to work off (all you have to do is trace over it).
- Make up a list of things you want to put in the garden (eg. washing line, shed, bbq, lawn area, vegie garden, children's swing etc).
- Draw in pencil where you think the best place would be to put each of these things.
- Now stand back and think for a week or so. If you like, ask friends or relatives what they think about where you plan to put things. Use a bit of common sense and consider whether each of these things is located in the best place (Refer to the list "What Goes Where")
- Rearrange the location of these different components, and settle on final locations.
- Fill in the gaps, placing lawn, shrubs, paving, mulch, gravel, etc. between the various components.
What Goes Where?
- The bbq, outdoor setting and patio should be together, and close to the kitchen, if possible.
- The rubbish bins, compost heap and burner should be away from the house and any outdoor living areas.
- The washing line is better hidden from outdoor entertaining areas, but in mild to cold climates it must be in a sunny spot.
- Areas where children play should be away from things you don't want damaged (eg. prize roses or the vegie garden).
- Areas which are walked over a lot should be well drained and surfaced with gravel, mulch or paving (grass will become damaged and high use areas may become slippery when wet).
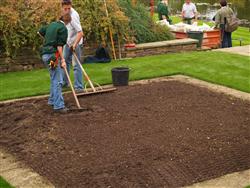
EARTHWORKS
Earthworks are the foundation of a good garden. As with anything, if you have a good foundation the rest of the job is much easier. Ideally earthworks should be planned before any other planning, and any soil shaping, building or drainage should be completed in an area before other work such as paving, fencing or planting. Earthworks involves the following:
1. Site Clearing
Remove unwanted plants, (weeds, dead trees, etc), rocks and rubbish (builders' rubbish, glass, drink cans, etc). Dispose of your rubbish properly, usually at a tip. Pay particular attention to plaster, cement and concrete which might be lying about. These things will affect plant growth if left there. Remember, once weed growth is removed, the area becomes more susceptible to erosion, so you need to quickly progress with further landscaping which will help stablize the ground.
2. Levelling
You are always best to work with the natural slopes of the ground. When you start changing levels, you change drainage patterns both through and across the surface of the soil. If changes made on your property affect your neighbours (eg. causing water to flood a neighbour's yard) , you have a legal liability to pay for any damage. Often the builder will have changed levels already to build the house, in which case further major changes may be needed. Often changing levels can help create character in a garden, and by hiring a machine such as a "BOBCAT", you can do a lot very easily; BUT KEEP IN MIND HOW THIS WILL AFFECT WATER FLOWING OVER YOUR PROPERTY. On very steep slopes, terracing may be the only way to create some useable outdoor living areas.
3. Soil Building
Light (ie. sandy) soils are easier to dig and are better drained, but they can dry out quickly, so plants will need constant watering.
Heavy (ie. clay) soils are hard to dig, often drain poorly and are initially difficult to get wet, but once wet, will stay wet longer.
Both types of soils can be improved by mixing in lots of organic material. Well rotted manure, wood shavings, compost, lawn clippings or anything similar will go a long way to improving most soils. It is usually best to mix this material in at least a few weeks before planting (in cold areas, a month or more).
4. Drainage
Drainage is improved in heavy soils by digging in organic material, or adding a soil treatment such as lime or gypsum. These cause the clay particles to move apart, allowing water to move more easily through the soil. Places where water builds up may need drainage pipes installed.
SOLVING DRAINAGE PROBLEMS
There are six ways to solve drainage problems:
1. Reshape the surface of the land so water flows somewhere else. Warning: don't divert water to create a concentrated flow onto your neighbours' property. You are legally responsible for problems you cause on your neighbours' property.
2. Improve the soil structure so it will drain more freely.
Soil is made up of a mixture of organic matter (eg. compost or mulch) mixed with clay, loam and sand. If there is a high proportion of clay, drainage is likely to be a problem. Mixing organic matter, sand or loam will begin a slow but effective process of soil improvement. As microorganisms move deeper into the soil, drainage and fertility will gradually improve.
3. Add Soil Ameliorants (eg. Lime).
Soil ameliorants are chemicals which cause clay particles to repel each other, thus opening up the soil and letting water in. They normally take months to show any effect, and they only work if the soil is kept wet.
4. Install drainage pits in low areas
A drainage pit is a large hole filled with sand or rubble. Water collects in the pit and gradually seeps away into the lower layers of the soil. The hole is best to be long and deep, not square or circular if possible, and at least 1‑2cu. metres.
5. Install surface drains
Commonly called spoon drains, these are normally half pipes (or concreted depressions set along at the bottom of a slope, or at the edge of a paved area). Water runs into the spoon drain and is carried to a collection point (an underground pipe in the storm water system or a drainage pit).
6. Install sub surface drains
These are pipes below the surface, which carry water to a collection point. (eg. agricultural drainage pipes buried below the surface and covered with a freely draining soil).
You may also be interested in....